


Lead Times
All orders typically ship within 5-7 business days. Large orders may take longer.
Returns & Cancellations
Installation
Care & Maintenance
Watch our Video
Step 1: Remove Loose Debris
Before applying any cleaner, vacuum the rubber floor with a soft brush head to remove dust, dirt, and loose particles. A vacuum works better than a broom because it can pull debris out of the small pores in the rubber.
- Adjust the vacuum brush height so it doesn’t scratch or mark the surface.
- A light to medium setting is usually enough to lift debris without causing damage.
Step 2: Wash the Floor
Rubber flooring is best cleaned with a mop, but not all mop types work well:
- Avoid cotton string mops or low-quality sponge mops, as they can shed fibers.
- Use a microfiber mop head for the best results.
Mix a pH-neutral cleaner (such as Zep Concentrated Neutral pH Floor Cleaner) with warm water, following the product’s dilution instructions. Mop the floor with a damp—not soaking wet—mop.
⚠️ If using a foamy cleaner (like dish soap), rinse the floor afterward with clean water. Skipping this step can leave behind a film that makes the floor look dull and attracts more dirt.
Step 3: Dry the Floor
Let the floor air dry completely. To speed up the process:
- Open windows for better airflow.
- Use a box fan to circulate air.
- Wipe up excess water with a dry microfiber cloth or mop.
For a more in depth explanation, check out our article "Is Rubber Flooring Easy to Clean?" in our education center.
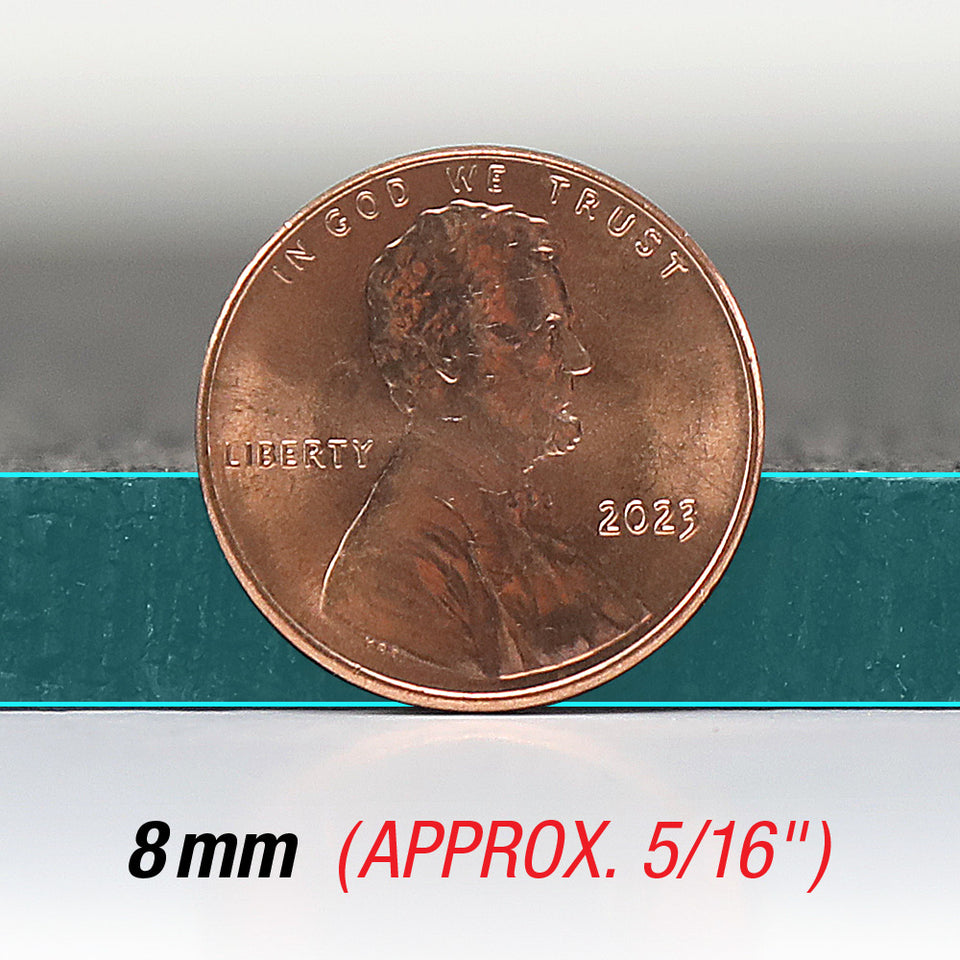
5/16" (8mm) Rubber Gym Tiles — 24” x 24” | Our Most Versatile Tile for Full-Room Weight Training Floors
The most popular combination in our tile lineup. The 5/16" (8mm) thickness gives you genuine weight training capability — free weights, barbells, squat racks, machines — while the 24” x 24” format makes full-room installation fast, efficient, and clean. At 4 sqft per tile with 6 color options (the widest palette in the 5/16" format), this is the tile that fits more use cases, more space types, and more buyers than any other tile we sell.
Made in the USA from recycled rubber, backed by a 5-year warranty.
Why 24” x 24” at 5/16" Is the Full-Room Workhorse
- Weight training capable — 8mm handles free weights, dumbbells, barbell work with controlled floor contact, and heavy equipment without flex or breakdown
- Fast full-room install — 4 sqft per tile means a 200 sqft room is only 50 tiles; at 18” it’s 85 tiles; the time difference is real
- 6 color options — the most color variety in the 5/16" tile format; Black, Gray, Blue, Blue/Gray, Eggshell/Cocoa, and Terra Cotta give you the palette to design a gym that actually looks good
- Cleaner finished appearance — fewer seams in an open room gives a more polished, professional look compared to smaller tiles
- Best per-sqft value in the 8mm tile format — the 24” tile costs less per square foot than the 18” version; for large installs the savings add up
Where This Tile Gets Used
- Home gym full-floor builds over concrete, tile, or hardwood where you want weight training protection across the entire room
- Garage gym transformations where you’re tiling wall to wall with a thickness that handles both the rack zone and the open training floor equally
- Commercial fitness facilities that need a reliable, repairable modular floor in weight rooms and group fitness spaces
- CrossFit and functional fitness boxes with mixed training: barbells, kettlebells, box jumps, rope climbs — the 8mm handles the demands of functional fitness well
- Dog kennels and pet facilities — the 24” tile makes large kennel areas fast to install; rubber is easy to clean, slip-resistant, and comfortable for animals; the interlocking edges can be spaced slightly for drainage
- Horse stable and barn flooring in wash areas and grooming stalls where you need easy-clean, cushioned rubber that can be rearranged or replaced
- School and community multipurpose rooms with weight training and group fitness mixed use
- Outdoor training areas, rooftop gyms, and covered patios where UV and weather resistance matter
How the Interlocking System Works
Puzzle-style interlocking edges on all four sides. No adhesive, no tools, no underlayment required. Press tiles together; they stay put under training loads. The loose-lay system gives you a floor that’s completely reversible — expand it, reconfigure it, or take it with you if you move.
- Add tiles to any edge to expand the floor at any time
- Lift out a tile to clean under equipment or swap a damaged piece without touching the rest
- Start from any corner or work from the center out — the symmetric interlocking design accommodates any install approach
Specifications
- Thickness: 5/16" (8mm)
- Tile Size: 24” x 24” (4 sqft/tile)
- Weight: 1.92 lbs/sqft (Black) | 1.96 lbs/sqft (10% Color fleck)
- Material: Recycled rubber (vulcanized SBR)
- Origin: Made in the USA
- Warranty: 5 years
- Colors: Black, Gray, Blue, Blue/Gray, Eggshell/Cocoa, Terra Cotta
- Installation: Interlocking loose-lay (no adhesive required)
- Use: Indoor / Outdoor
Compare Tile Options
| Option | Best For | Price Per Tile |
|---|---|---|
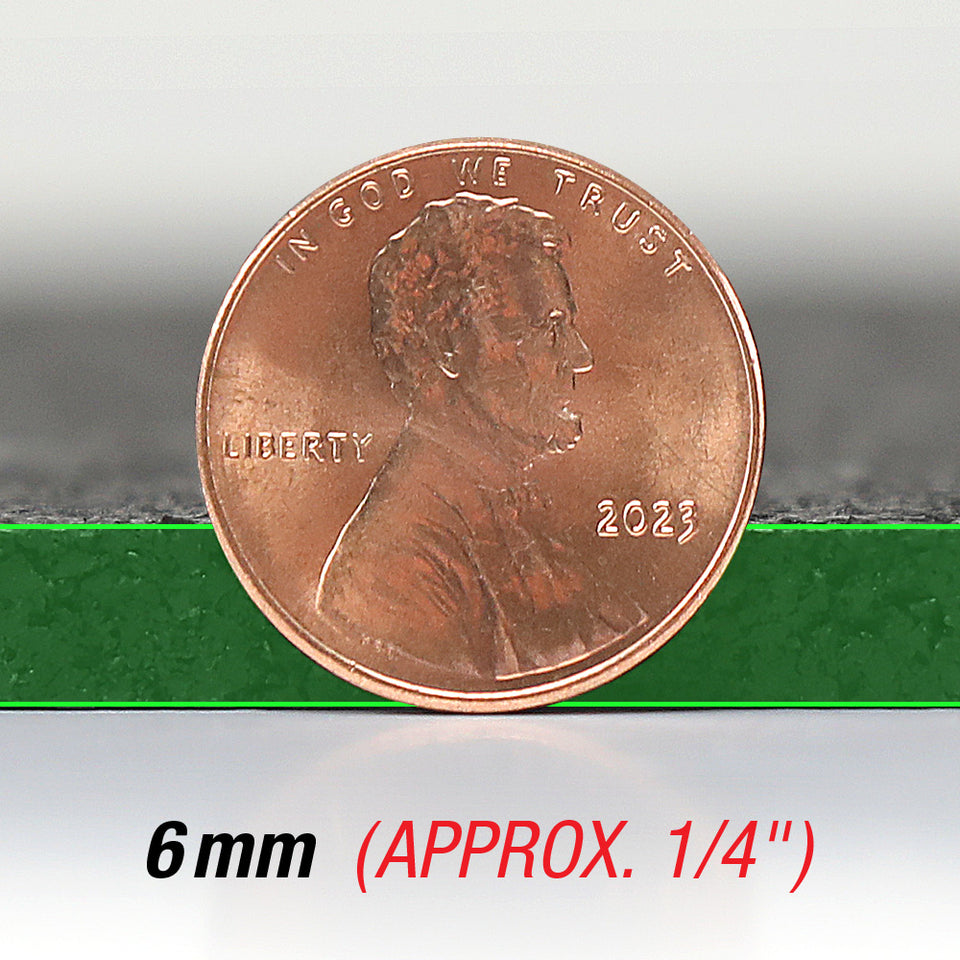
| 1/4" (6mm) 24” x 24” | Cardio, yoga, light-use floors — most affordable tile | $ |
| 5/16" (8mm) 18” x 18” | Weight training zones, partial coverage, irregular rooms | $$ |
| 5/16" (8mm) 24” x 24” ← You Are Here | Full-room weight training, 6 colors, fastest install | $$ |
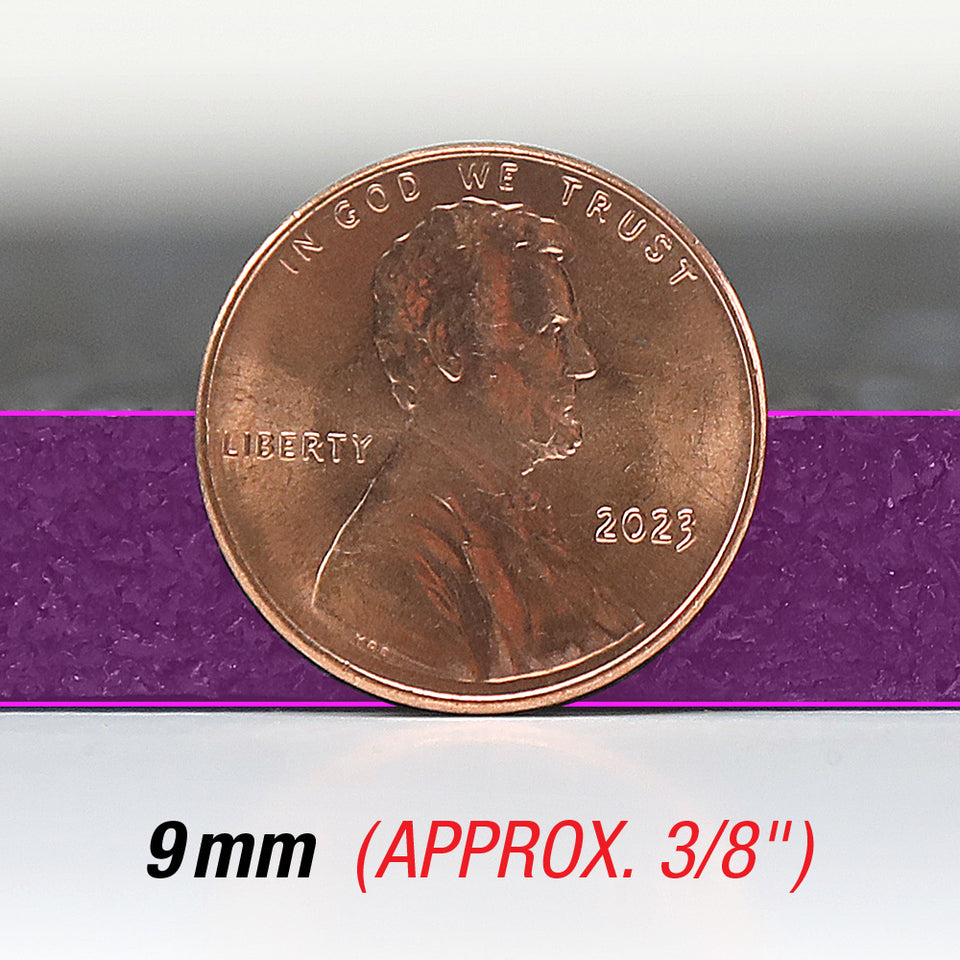
| 3/8" (9mm) 18” x 18” | Best-selling thickness, modular zone-by-zone builds | $$$ |
| 3/8" (9mm) 24” x 24” | Best-selling, full-room gym floor, 6 colors | $$$ |
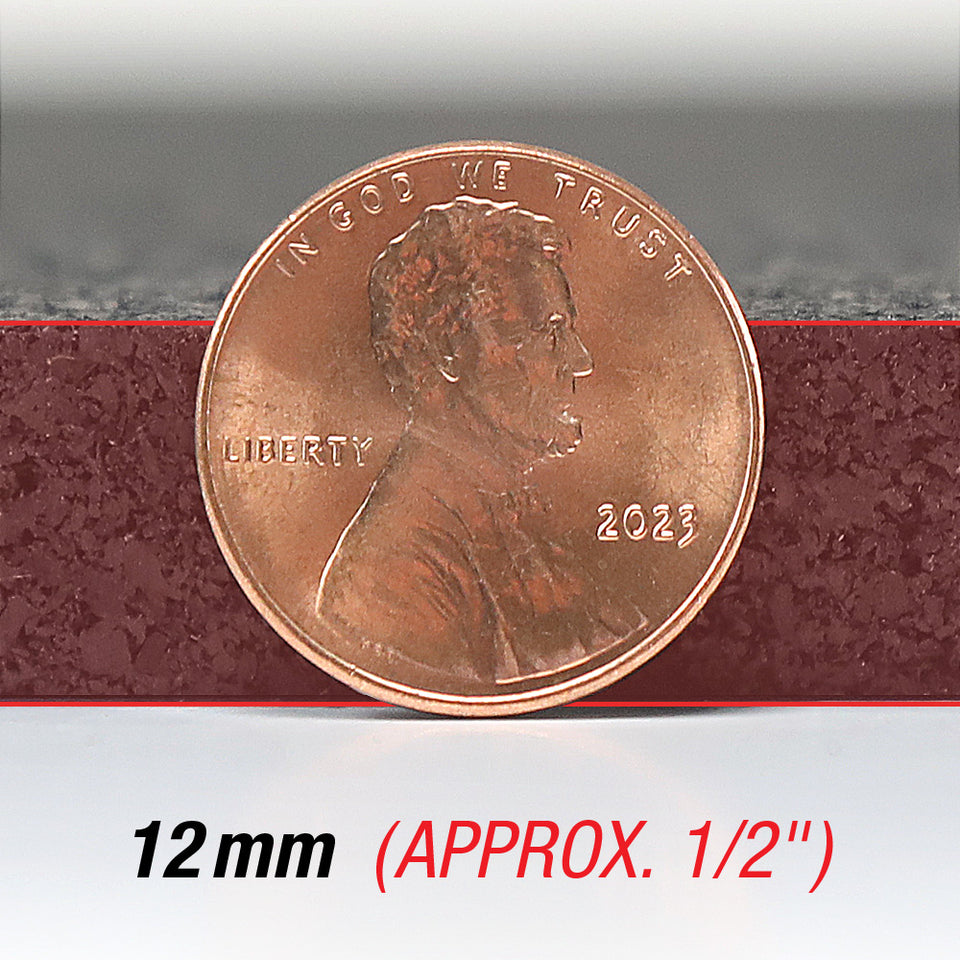
| 1/2" (12mm) 18” x 18” | Maximum protection, powerlifting zones, modular | $$$$ |
| 1/2" (12mm) 24” x 24” | Maximum protection, powerlifting, Olympic lifting, CrossFit drops | $$$$ |
Installing 5/16" rubber over your entire gym floor? Our 5/16" rubber rolls cut to exact length are the most popular full-floor option we carry — same rubber, same USA manufacturing, continuous coverage with no tile seams.
Frequently Asked Questions
How many tiles for a 2-car garage gym?
A standard two-car garage is roughly 20’ x 20’ (400 sqft). At 4 sqft/tile, that’s 100 tiles plus 5–10% overage for edge cuts = 105–110 tiles. If you’re only covering the workout zone and not full wall-to-wall, reduce accordingly. The 24” format makes large garage installs significantly faster than 18” tiles.
Is 5/16" thick enough for dropped barbells?
For controlled barbell work where the bar touches the floor between reps (deadlifts, rows), yes — the 8mm absorbs that impact well. For intentional drops from overhead or failed maximal attempts, the 1/2" (12mm) tile is the right choice. The 5/16" is built for weight training; the 1/2" is built for impact.
Can I use these tiles in a kennel with drains?
Yes — for areas with floor drains, you have two options: tile up to the drain with standard interlocked tiles, or install tiles with a small gap between them to allow liquid to pass. The interlocking edges don’t seal watertight, so some drainage naturally occurs. For maximum drainage in wash areas, the slightly-spaced approach works well. The rubber itself is easy to sanitize with standard kennel disinfectants.
What’s the price per square foot for the 24” tile?
Black tiles: $2.16/sqft ($8.64 ÷ 4 sqft). Color tiles (Gray, Blue, Blue/Gray, Eggshell/Cocoa, Terra Cotta): $2.34/sqft. For comparison, the 18” Black tile is $2.25/sqft — the 24” format saves about 9 cents per square foot in Black, which adds up on large installs.
Does the interlocking system work on uneven floors?
Reasonably well for minor variation — 1/4” to 1/2” level changes across a room. For significantly uneven floors (more than 1/2” slope or notable dips), the tiles may rock at the seams. Flatten significant dips with self-leveling compound before tiling for the best result. Standard concrete floors with normal variation tile with no issues.
Thickness
request a custom quote
We’re here to make your project planning simple and stress-free. Our team will help you determine exactly what materials and products you need to get the job done right. Just share a few details about your project using the form, and we’ll prepare a personalized quote tailored to your specific requirements. Whether you’re working on a small DIY project or a large commercial installation, we’ll make sure you get the right products, quantities, and pricing to fit your needs. Once we receive your information, our experts will get to work and follow up quickly with your custom quote.
How to Install Rubber Tile Flooring
-
Great Customer Service
I reached out to them and I spoke to Jay. He was great! I didn't know what I should get for my extra room we wanted to turn into a workout area and he helped me out. We are very happy with how everything turned out.
-
Very Happy
This product delivered exceptional value for our outdoor gym. The superior quality and impressive results justified the purchase, and the remarkably fast shipping was an unexpected bonus. A key factor in our satisfaction was finding rolls of this length at such a competitive price, which was crucial for completing our project without exceeding our budget. This product provided an ideal solution.
-
Easy to Install and looks Great
We love this rubber flooring! It was super easy to install and instantly gave our space a smooth, clean look. It's great because it keeps the cold from the concrete off your feet. The initial rubber smell was gone in just a day. It's also easy to keep clean, making it a smart and valuable choice for us.
Blog posts
 Read more
Learn how to clean rubber flooring like a pro. Follow our 3-step guide for gym mats, rolls, and tiles using the right tools and solutions.
 Read more
Compare horse stall mats vs. gym flooring. Learn why professional rubber flooring from RFS is the superior choice for safety, smell, and sanitation.
 Read more
Not all recycled rubber flooring is created equal. From skive marks to internal dry spots, we dive into the common manufacturing defects that separate high-quality American-made rubber from inferior products.


